

|

|
|
Putting 17x11 rims with 315/35/17 tires on the back of a 4th-generation f-body is not an easy task unfortunately. I planned and researched the issue for about 2 years and thought I knew of all of the tips, tricks, and snafu's; as it turns out I didn't. Corvette ZR1 rims will fit on a 4th-gen (17x9.5 in front and 17x11 in the rear). The 17x11 rim has a 36mm offset which results in the wheel/tire sticking out of the fenderwell about 1/4" of an inch on either side.
There aren't a lot of wheels that are made in a 17x11 size. I had found some Weld Racing rims that I really liked (the EVO Type 05) and were made to the same dimensions as ZR1 rims. When the time came to order the rims, I found out that style had been discontinued and there were no more 17x11's left in any distributor warehouses either.
Other manufacturers that make a 17x11 rim that would fit include:
- Center Line - I didn't care for any of their styles
- Fikse - Loved the rims, but extremely high priced
- Kinesis Motorsport - Loved the rims, but extremely high priced
- Forgeline - Price was on the high side of my budget and I wasn't crazy about the styling
- Weld Racing - There are other EVO styles that would fit, but I think their styling/marketing departments have been doing too much acid
- HRE Wheels - Some of their rims were amenable to me, but the price was too high
Both issues can be solved by using the Grand Sport 17x11 rim, which has a 50mm offset (so it tucks in tighter to the centerline of the car) and also has a less deep looking "lug nut well". People have said that you need to run a wheel spacer because otherwise you'll get rubbing of the tire on the inner fenderwell. A local Bay Area list-member (Dave Downing) has chromed Grand Sport rims on his car and runs his with no spacer; this was the first time I had seen anybody doing this. His inner wheelwells had been beaten in a little but he was still getting rubbage. The other problem with the Grand Sport wheels is that they are black and I didn't want to have black wheels on my car.
A company in southern California called Performance Wheel casts their own wheels and has a ZR1 replica rim that is available in a 17x11 in both the ZR1 and GS offsets. I almost went this route but decided not to because these rims are heavier than the real GM rims and while we're only talking a difference of a few pounds I wanted to minimize unsprung weight and rotational mass if I could.
In the end I wound up ordering the following parts from Dal at Lambert Buick (800-711-2793):
| GM Part Number | Cost | Quantity | Description |
|---|---|---|---|
| 12512905 | $298.00 | 2 | 17x9.5 ZR1 front wheels (silver finish) - 19 lbs |
| 12361446 | $298.00 | 2 | 17x11 GS rear wheels (black finish) - 21 lbs |
| 10194314 | $1.72 | 16 | Externally threaded lug nuts (not needed for 97/98 cars) |
| 12337914 | $1.22 | 20 | Lug nut covers (silver plastic) |
| 12364008 | $5.82 | 4 | Bow-tie center caps |
| 999057 | $11.67 | 1 | Externally threaded locking lug nut set (not needed for 97/98 cars) |
I also ordered BF Goodrich Comp TA's from Tire Rack - 2 275/40ZR17's and 2 315/35ZR17's.
I'm going through all this effort to have some mean looking and gripping wheels and tires, so of course I'm not going to have silver rims on the front and black rims on the back. I took the wheels to a place called Wheel Techniques in Campbell, CA and they stripped the black rims down to the metal, repainted them to match in silver, and then clearcoated them. The cost was $125 per rim.
I also needed to get the fenderlips rolled (so they wouldn't cut the tire if the tire got that high) and Dave Downing recommended a body-guy friend who could slightly flare the rear fenders to provide additional clearance. I was a bit leary of having the fenders flared, but they came out really well. If you don't want to run a wheel spacer (and I didn't) the wheelwells also need to be beat in which this body-guy did as well. I later needed to do some more beating with a small sledgehammer and an air impact hammer, but it's not terrible to do. The area that has to be "relieved" is in the front of the wheel well, pretty much in the full arc of the tire and then up from there to account for suspension compression. The area around and above the bumpstop will also need to be moved in. In some areas, the metal is extremely strong/thick structural material and won't respond well to being moved much. Either just bang harder or wait and see later if that turns out to be a rub-spot. Also, one warning: when doing all of the wheelwell "massaging" make sure the back seat is locked in position (and not folded down). If not, then the pins that it latches on to will be moved and the backseat will no longer latch correctly until you bang the pins back into alignment. Guess how I know this.
Speaking of the bumpstops, without using a spacer, the tire/wheel surface will sit in extremely close to the bumpstop. So close that you won't be able to mount the wheel on the axle with the suspension at full droop. This also means that from now on you have to jack the car up by the rear axle, and then remove the wheels. I worry that a big enough bump in the road could cause enough suspension drop to let the bumpstop hit the inside surface of the rim, but so far it hasn't happened yet (fingers crossed). I did grind away as much of the bumpstop bracket/nuts as I could to minimize any chance of contact. Jeff Stevens (who did the same wheel/tire setup as me) cut his bumpstops completely out and is trying to figure out either a way to make new ones somewhere else or to see if he can run without them without incident (so far so good for him).
Make sure you pick up some new undercoating spray because as you bang on the wheelwell, the undercoating will flake off in big chunks. 3M makes a couple of aerosol can types of spray-on undercoating. Generally speaking the stuff is called "rubberized undercoating" or "schutz".
So enough talk, time for some pictures!
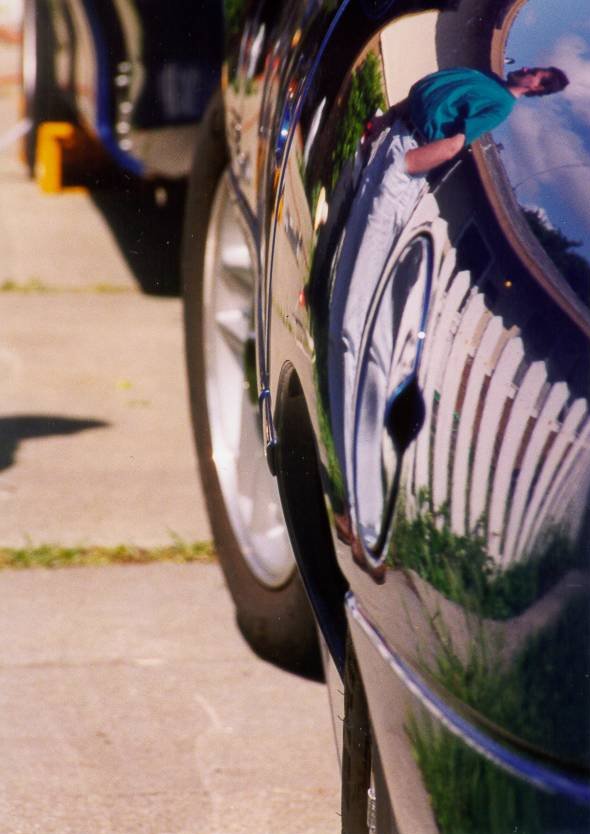 Stock rear fender |
 Stock rear fender |
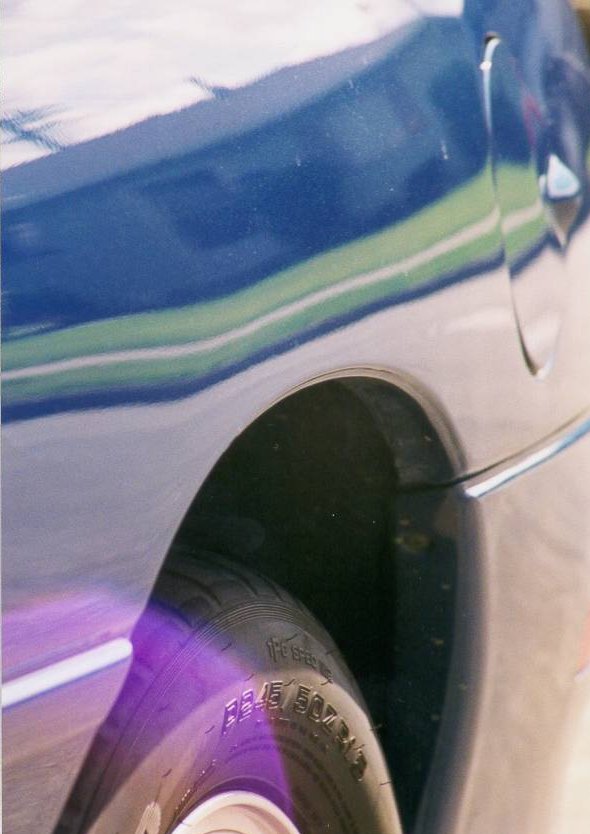
 Flared rear fender |
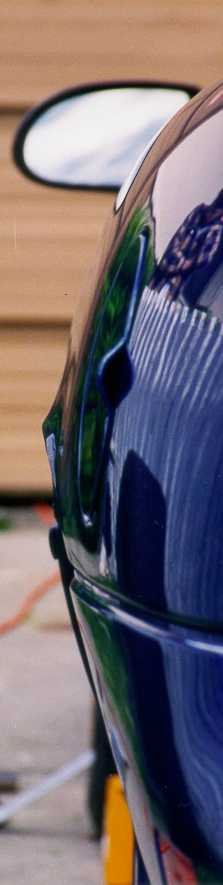
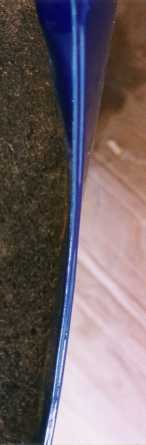 Looking straight up (12 o'clock) at the driver's side rolled fender lip |
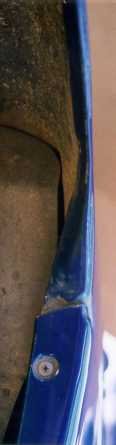 Looking back (2 o'clock) at the driver's side rolled fender lip |
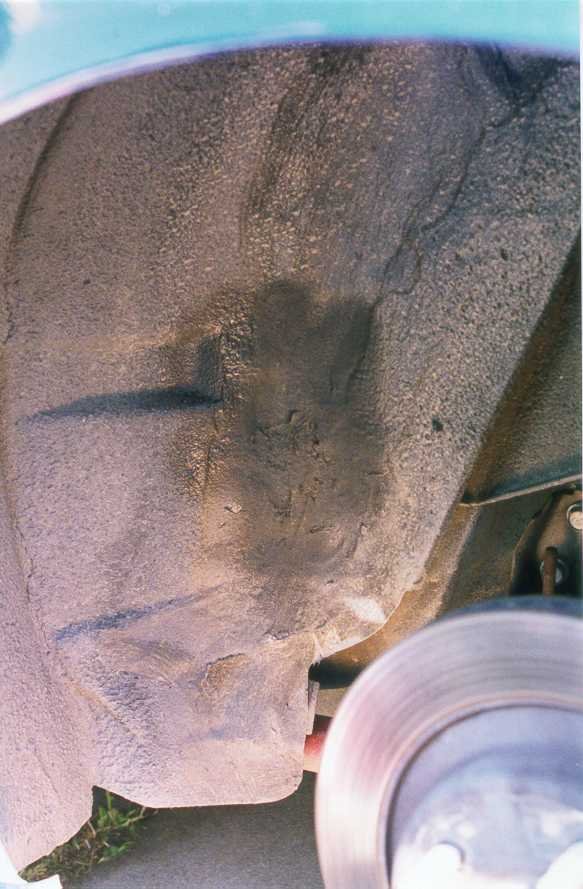 Inner fender area showing the results of lots of beatings. The dark patch is just from the most recent pounding and re-undercoating. |
 |
 |
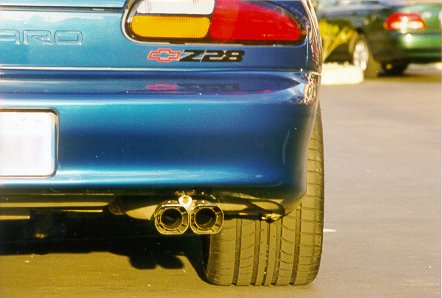
In conclusion, how happy am I? VERY! It turned out to be a bit more complicated than I was expecting, but in the end it was very well worth it. The wheels/tires look great, hold the road great, and fit well. I still have one spot to bang in some more - this was discovered in a high-speed 180-degree sweeper on the auto-x course. Otherwise the tires don't rub anywhere any more unless the rear axle gets severely canted (like not going up a steep driveway straight) or there's a lot of weight in the car and a hard turn is made.
 Back
Back Last updated: 6/19/98